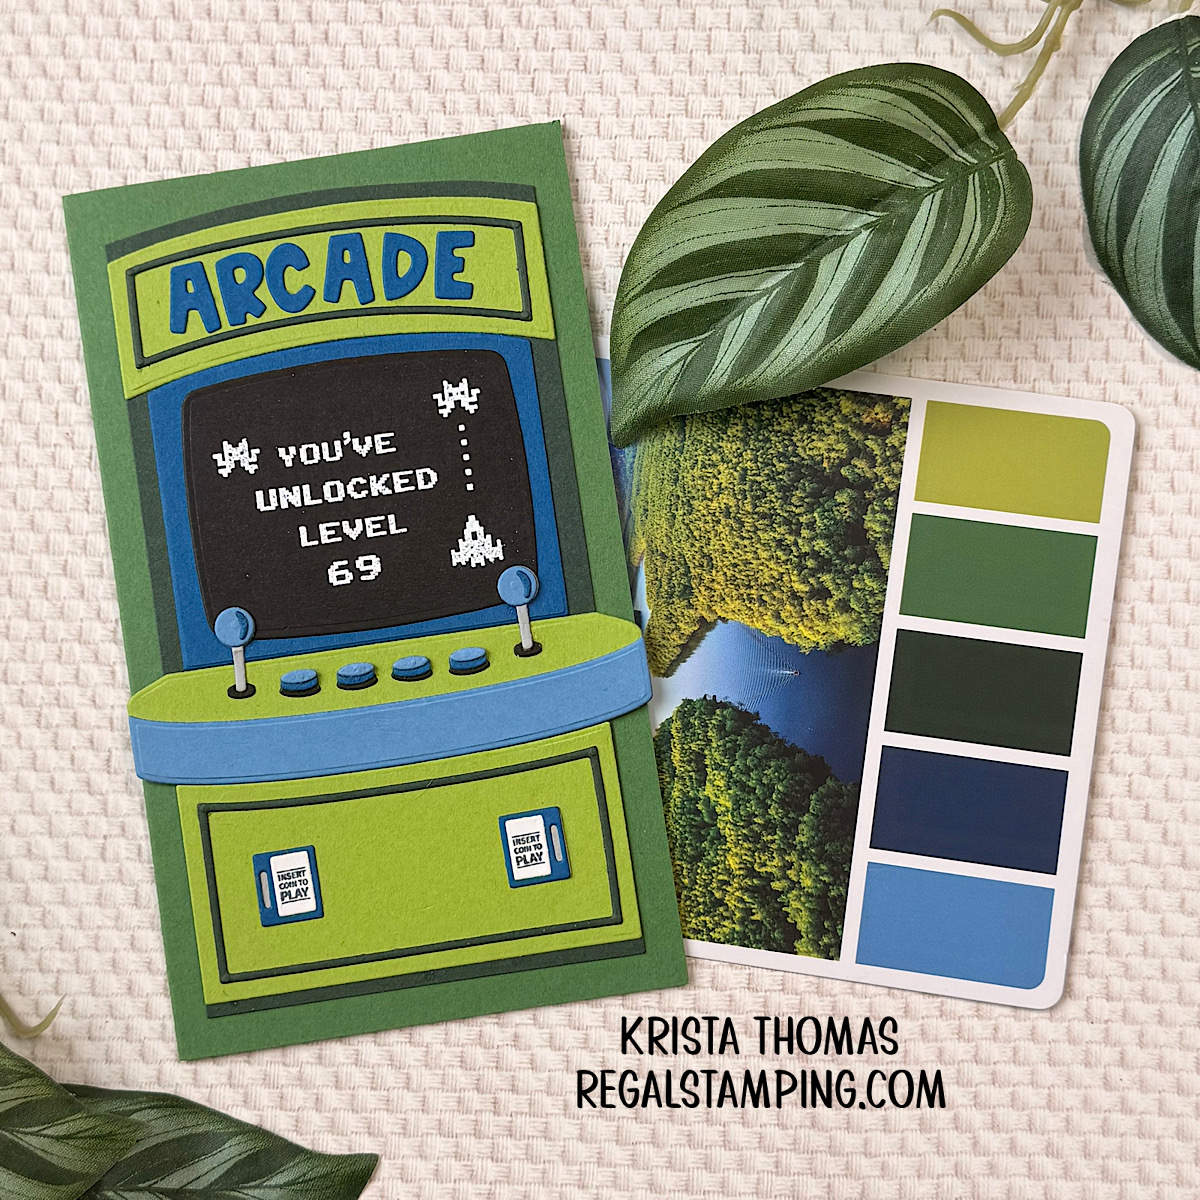
My husband is a bit of an arcade junky, so when I came across the Arcade Machine Builder Dies and the coordinating stamps from Trinity Stamps, I had to order them! Today’s card will be his next birthday card and what better way to celebrate than with a little old-school gaming?
For the color scheme, I turned to my Sarah Renae Clark Color Cubes for some inspiration. I settled on card #001, which features a fun combination of green and blue shades. I love using the Color Cubes when I’m stuck on colors because they take the guesswork out of putting a palette together. This particular combination seemed perfect for a masculine arcade card.
I discovered that the dies do not come with any assembly instructions, so I had to look at their website samples to figure things out. I’ll share my process below.
Mini Slimline

I created the card in a Mini Slimline size, which fits great with the assembled arcade.
To make a mini slimline card, I cut a cardstock panel that measured 7″ x 6″ and then folded it so that the finished size was 3 1/2″ x 6″. The widest part of the arcade game is 3 5/8″ so it fits with just a smidge of overhang. One could easily make this a larger card, but I chose not to.
I picked my cardstock colors and then laid each die on the color I would cut it from. I referred to the picture on the packaging for this step.
Assembling Each Section
After die-cutting, I began assembly. The arcade is put together in sections, so as I completed each one, I set them aside.
There are some very tiny pieces that make the controllers and buttons, so using tweezers is a must! They’re not difficult to assemble, they’re just tiny. After assembly, they were glued to the console piece.

Before I assembled the black screen onto its frame, I used 8 Bit Birthday and 8 Bit Alphabet to stamp and heat emboss the sentiment. I also stamped “insert coin to play” onto the white pieces. I’m not sure I’ve ever had a word stamp so tiny, but it stamped perfectly!
Of course, the sentiment is what really makes this card perfect for my husband. It says:
“You’ve unlocked level 69” (you could put any age here).
Final Assembly

To give the machine it’s base (or cabinet), I cut a green panel measuring 3″ x 6″. All of the assembled pieces would get glued to this.
Starting at the bottom of this panel, I allowed a 1/8″ border and glued the bottom section of the machine down. Next was the console section, then the screen and finally the top “ARCADE” section. I used scissors to trim across the top, once again leaving a 1/8″ border.
Finally, I glued the assembled machine to the slimline base.
The Inside Finishes the Greeting

Finishing the inside of my cards is a must, so I cut a white panel 3 1/4″ x 5 3/4″ and glued it to the inside of the green card base. Using 8-Bit Birthday, I stamped the following sentiment in green and blue inks: “Happy Birthday, Press Play to Celebrate”.
I’m pretty sure he’ll appreciate the humor—and hopefully he’ll consider this card worth a high score! In any case, I’m so glad I discovered these products from Trinity Stamps and I can’t wait to make more!
Now all I need to do is figure out what game we’re going to play on his birthday! My favorite has always been Spider Fighter, which definitely shows my age! LOL 🙂 If you like have some “classic/retro/vintage” related cards on hand, here’s another idea: Introducing Classic Hot Rods. I enjoy making cards that remind me of the good old days, don’t you?
Until next time,
~Krista
Please note that this post contains affiliate links. If you click on a link and make a purchase, then I may receive a small commission at no extra cost to you. This helps in the cost of maintaining my blog, thus allowing me to continue sharing with you. Thanks in advance for shopping from my links! I appreciate you!


Discover more from Regal Stamping
Subscribe to get the latest posts sent to your email.