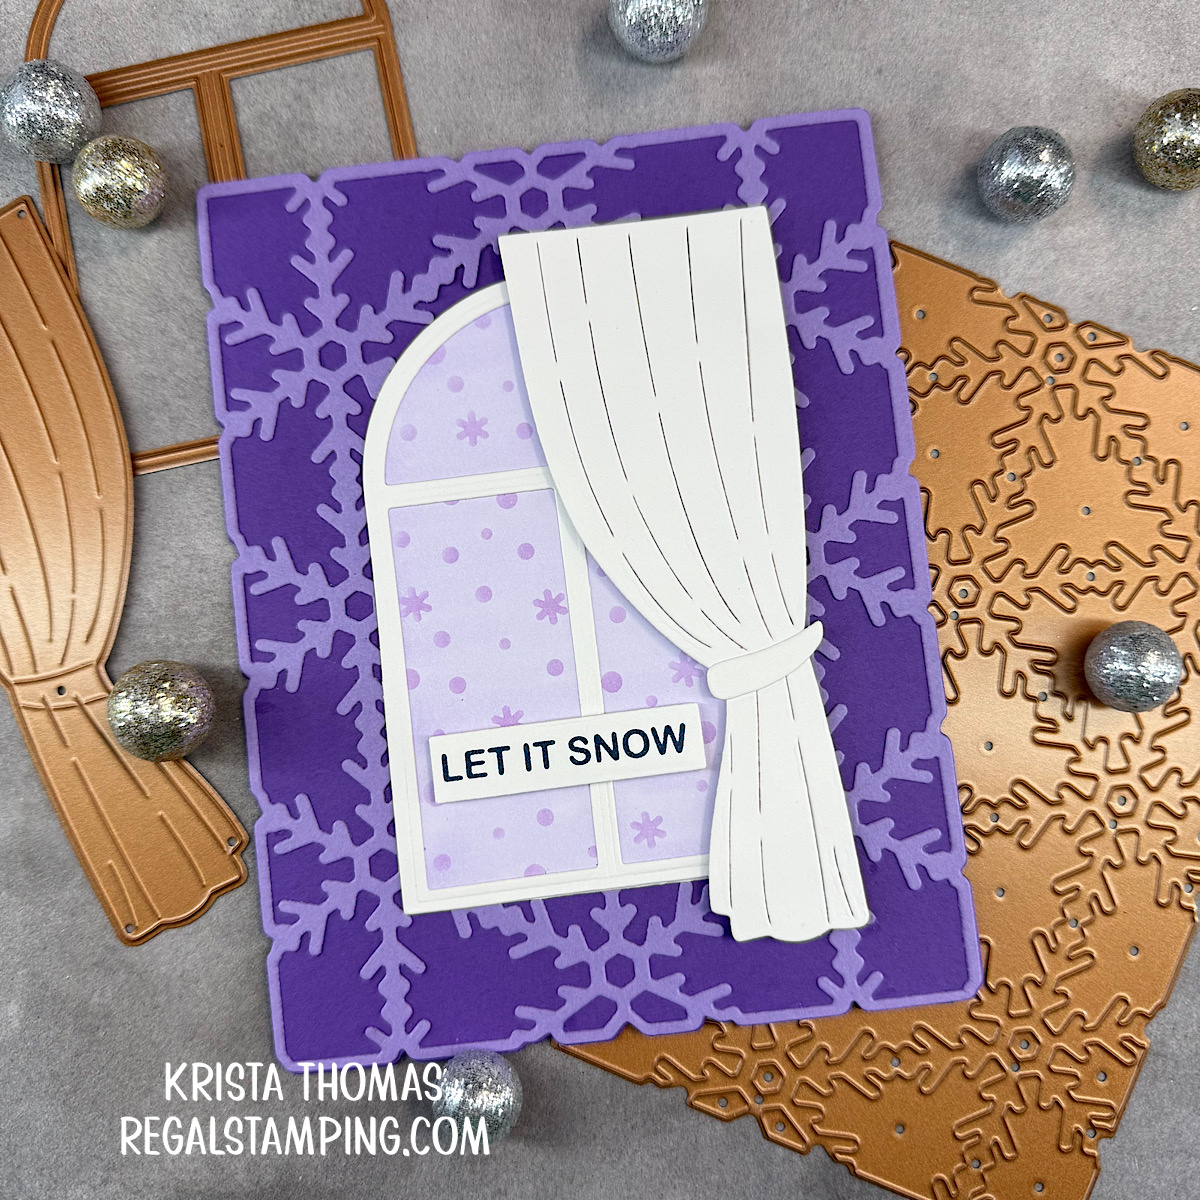
There’s something so magical about Christmas cards in shades of purple. As much as I love the classic combination of red and green, every now and then it’s fun to switch things up with a softer, unexpected color palette. Today’s card is filled with frosty lavender tones and features Lisa Horton’s beautiful new Snowflake Kisses collection, now available at Spellbinders.
For the focal point, I paired the elegant Snowflake Background Dies with Yana Smakula’s Christmas Cats Window View. I love the cozy feeling of peeking through a window while snow falls outside. Instead of traditional white snow, I created a dreamy lavender sky using Newton’s Nook Petite Snow Stencil, giving the background a whimsical winter feel.
Let’s take a closer look at how this card came together!
Cutting the base
I began with just the outline from Snowflake Background Dies, cutting it from a piece of Lilac ColorWheel Cardstock. I then cut both the outline and the inner die from a Lavender panel. After adhering the Lavender piece to the Lilac piece, I set them aside and cut one more of the outline from a white panel. This would become the back of the card with the use of the hinge method. There’s a tutorial in this previous post: It’s All About…
Here’s a picture of the back, showing the “hinge”.

Adding a Window View
Secondly, I used the window die outline from Christmas Cats Window View, cutting it from Fairytale ColorWheel Cardstock. This is a very light shade of purple and was purfect for today’s card. Onto this diecut piece, I stenciled some snowflakes with Petite Snow Stencil from Newton’s Nook. I like the simplicity of this stencil.
Next, I used the window outline with the window frame die and cut it from white cardstock. This was glued over the stenciled piece and then adhered to the card front. Continuing with the Christmas Cats Window View Dies, I added a white curtain across the right side of the window. After adding some foam glue dots to its backside, I placed it over the window. I love the dimension achieved by popping it up.

Snowflake Kisses Sentiments
Finally, I created the sentiment “Let it snow” from Snowflake Kisses Sentiments set. This is a Press + Foil Plate +Die Set, which means it can be foiled or BetterPressed. For today’s card, I used black ink with the BetterPress LetterPress System and ran it all through my Platinum 6 Die Cut Machine. I ended up with a whole bunch of sentiments, as this set is quite large and consisted of 2 plates and 2 dies. Meaning that a bunch of words get pressed and cut out at one time! I love that!!

After placing the sentiment to the left of the curtain and near the bottom of the window, my card front was complete! Now it was time to do the inside.

Snow Days are the Best!
I wanted to keep the inside pretty simple, so I trimmed a piece of Lavender cardstock down to 4″ x 4 5/8″ and glued it to the inside of the card base. Next, I stamped three snowflakes from Cue the Merry stamp set using purple ink. I then stamped a sentiment from the same set onto white card stock. It was cut out with the coordinating die and placed onto the inside panel. It says, “Hope your Christmas is as happy as a snow day”.
If you’d like to send your own snowflake kisses Christmas cards, head over to Spellbinders and check out Lisa Horton’s Collection!
Happy crafting,
~Krista
This post contains affiliate links. If you click on a link and make a purchase, then I may receive a small commission at no extra cost to you.
Supplies Used
 Snowflake Background Etched Dies Shop at: SP | SC | AM |
 Snowflake Kisses Sentiments Press & Foil Shop at: SP | SC | AM |
 Christmas Cats Window View Shop at: SP | SC | AM |
 Classic White ColorWheel Cardstock Shop at: SP | SC |
 Fairy Tale ColorWheel Cardstock Shop at: SP | SC |
 Lavender ColorWheel Cardstock Shop at: SP | SC |
 Lilac ColorWheel Cardstock Shop at: SP | SC |
 Platinum 6 Machine Shop at: SP | SC | AM |


Discover more from Regal Stamping
Subscribe to get the latest posts sent to your email.