Today I’m walking you through how to create nautical themed cards, perfect for the men in your life! With Spellbinders’ June Club of the Month and its ocean-inspired designs, crafting these seaside scenes is a breeze.
I first introduced the June clubs in my previous post, Crafting Coastal Magic: Scenes from the Ocean.

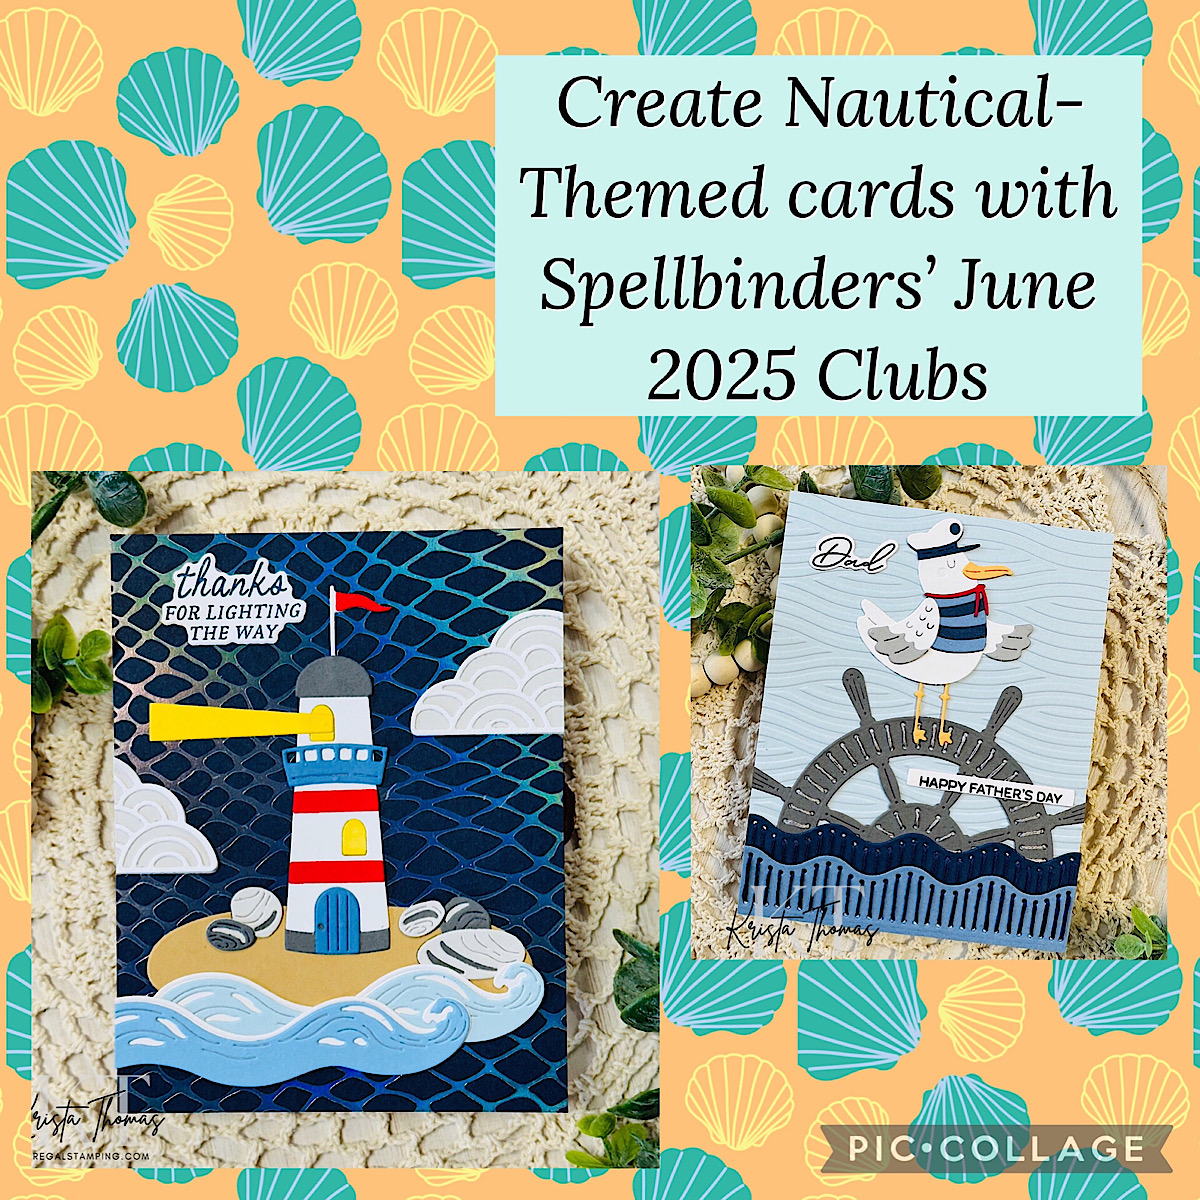
The first card I’m sharing is one that I made for my dad for Father’s Day. I incorporated the Ahoy Matey stitching dies, along with some previous club sets, Nearest & Dearest and Summertime Waves.
Step by Step instructions:
- Cut a Classic White card base measuring 4.25” x 11”, scored and folded at 5.5”.
- Emboss a 4.25” x 5.5” panel of Windy Colorwheel Cardstock with the Summertime Waves embossing folder.
- Die cut the waves from Celestial and Indigo card stocks, using Ahoy Matey Stitching Dies. Stitch with a navy blue DMC thread, securing on the back with yellow 1/4” tape.
- Use the steering wheel (or helm) die from Ahoy Matey, cutting it from a piece of Anchor card stock. Stitch with gray DMC thread.
- Once again, use the Ahoy Matey dies to cut out the seagull. I used White, Fog, Saffron, Celestial, Indigo and Pomegranate card stocks. Piece the seagull together.
- Stamp the sentiments from Nearest & Dearest stamp set using Memento Tuxedo Black ink. Cut with coordinating dies.
Putting it together:
- Adhere the embossed panel to the white card base. The fold will be at the top of the card.
- Layer and adhere the two waves at the bottom of the card front, tucking the helm behind the top wave and adhering securely.
- Adhere the seagull so that it’s feet are over the top of the helm.
- Adhere the sentiments where desired. Your card is complete!
The second card I’m sharing today incorporates the large die of the month, Sailor’s Light, along with the glimmer of the month, Cast Away. I added sentiments from the stamp of the month, Anchors Away.

Step by Step instructions:
- Create a card base with Classic White card stock measuring 4.25” x 11”. Score & fold at 5.5”.
- Use Spellbinders Glimmer Machine with Cast Away glimmer plate and Opal hot foil to transfer onto an Indigo panel measuring 4.25” x 5.5”.
- Die cut the lighthouse, waves, rocks, island and clouds with Sailors Light dies. Card stock colors are Classic White, Anchor, Fog, Fawn, Poppy, Bees Wax, Windy, Cascade and Celestial.
- Assemble lighthouse, waves, rocks and clouds.
- Stamp a sentiment from Anchors Away stamp set using a navy blue ink. Cut out with coordinating die.
Assembling the card:
- Glue the glimmered panel to the card base. The fold will be at the top of the card.
- Play around with placement before adhering the lighthouse, waves, island and clouds. When satisfied, begin by gluing the island onto the card front.
- Continue adding pieces to the scene until everything is added.
- Adhere the sentiment in the top left corner, or where desired.
I fell in love with the Opal hot foil roll that came with my June club kit! It’s clear with an iridescent shimmer, allowing the color of the card stock to show through. I’ve had fun experimenting with different colors and plates and can definitely say that Opal is now one of my favorite foils!
Summing it up:
I hope I’ve inspired you to make some masculine nautical-themed cards using June’s Club of the Month Kits. There is still time to order, but that window will close on the 27th. Don’t miss out!
This post contains affiliate links. If you click on a link and make a purchase, I make a small commission at no extra cost to you. Thank you to those who shop using my links! I appreciate you!
Thanks for visiting my blog and I hope you enjoyed these quick tutorials.
Until next time,
~Krista

Discover more from Regal Stamping
Subscribe to get the latest posts sent to your email.