With springtime just around the corner, I find myself happily daydreaming about planting my garden—imagining rows of fresh veggies and beds of blooming flowers. The Spellbinders February Club Crate captures that fresh Spring/Easter feeling perfectly, and today I’m delighted to share one of its standouts: the beautiful Spring Stitched Tree Dies. February clubs are open as of today for new subscribers, in case you’re interested!
What’s Included in the Spring Stitched Tree Die Set?
This die set is super versatile and includes a tree trunk with branches, leaves and flowers that can be stitched or cut without the stitching holes. I love having that option! Additionally, there’s a die that creates a patch of ground to anchor the tree, as well as two sentiment banners.
Let’s Put it Together!
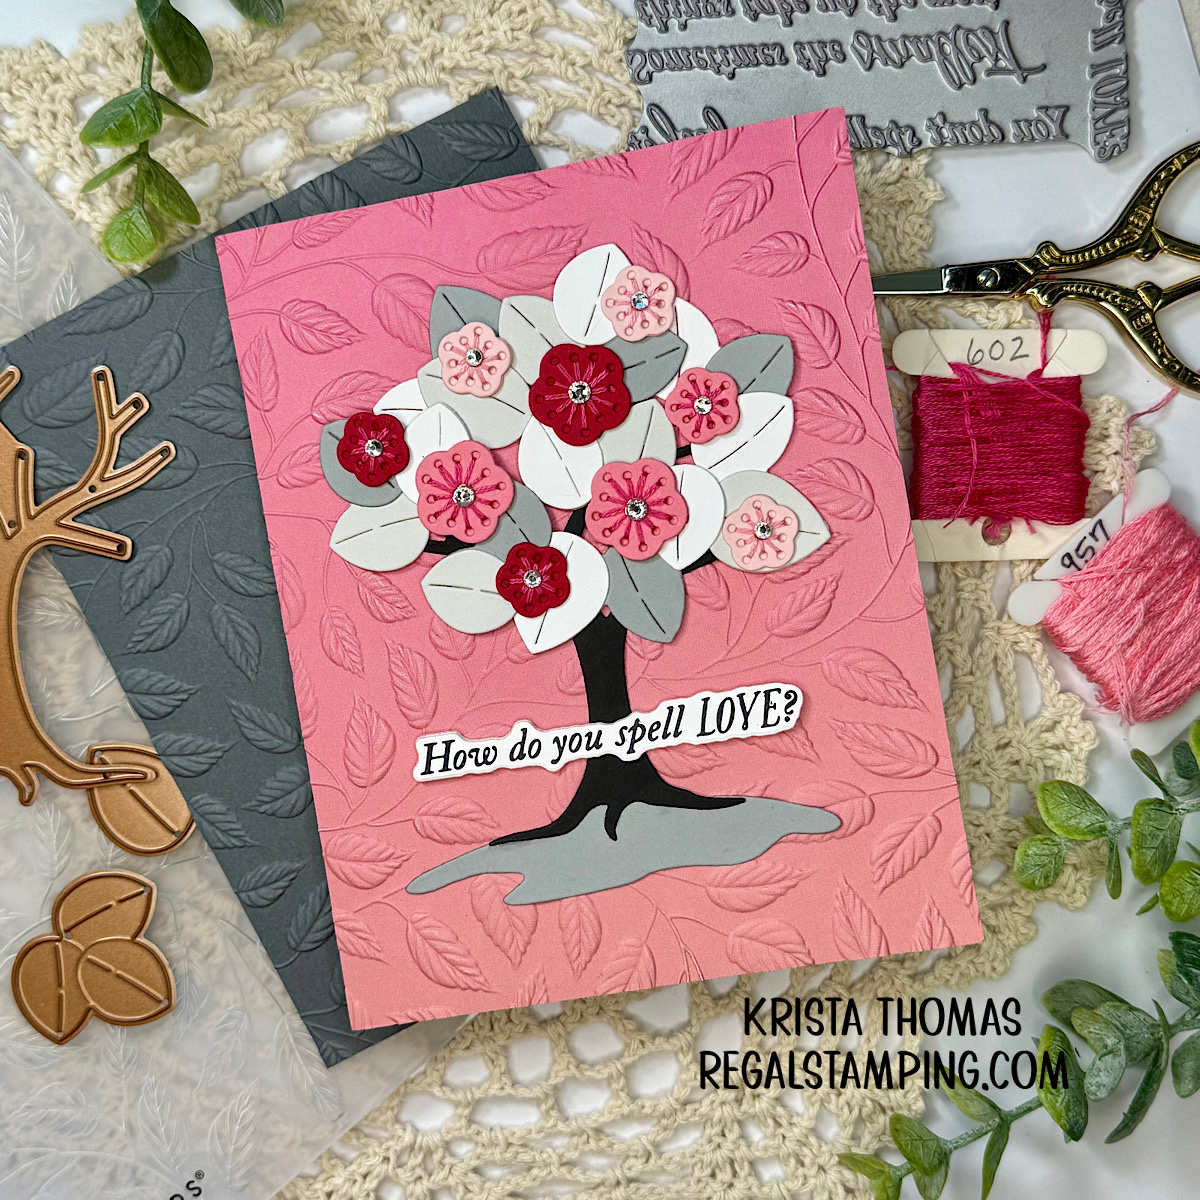
For today’s card, I started with a panel cut from Lawn Fawn’s Gleeful Gradients, which has a beautiful ombre’ effect. Its measurements are a standard A2 size, 4.25″ x 5.5″. After texturing it with Shady Leaves 3D Embossing Folder, I adhered the panel to a folded white card base. This embossing folder is part of February’s Club of the Month at Spellbinders.
Choosing a Color Palette for the Spring Stitched
Tree
I wanted the tree to be in neutral tones of black, grey & white. With that in mind, I cut the trunk from Raven cardstock. Next, I cut a pile of leaves from Fog, Anchor & White ColorWheel Cardstocks. The patch of ground was cut from Anchor.

Next came the fun part! I wanted the flowers to mimic the background colors, so I cut a bunch from Blush, Tutu and Wild Berry. I included the stitching holes in my die-cutting process and then sat down for a quick session with a needle and some DMC floss. Once finished, I added a rhinestone to each flower center and then placed them onto the tree.

How Do You Spell Love?
Because my color theme was well suited for a Valentine card, I used sentiments from Sweet Sentiments Press & Foil Plate. The card front says, “How do you spell LOVE?”, while the inside says, “You don’t spell it, you feel it”.

I love adding decorative elements to the inside of my cards. In this case, I placed a 1.5″ vertical strip of the Gleeful Gradients paper down the left side and then added a few stitched flowers-minus the rhinestones-and finished with the sentiment.
In summary, I believe this Spring Stitched Tree is going to useful year-round, for every season! I can’t wait to add some cute Easter eggs in place of the flowers! Wouldn’t that be cute? And if you love designing with trees, here’s another die set that I shared it in this previous post: Fall in Love…
Until next time,
~Krista
Please note: This post uses affiliate links at no additional cost to you! By clicking the links in this post, I will earn a small commission should you make a purchase. Thank you in advance!

Discover more from Regal Stamping
Subscribe to get the latest posts sent to your email.