The newest release from Spellbinder’s Press & Foil Club, From Ink to Petal is innovation at its best! It’s a combination of BetterPress Letterpress plates (which can also be foiled) and some coordinating stencils. The result? Gorgeous tulips with depth, shading, and that signature pressed texture or foil that we all love. With it, you’ll be easily making cards that are in full bloom!
Whether you love the timeless elegance of a BetterPress Letterpress impression — with its crisp, inked detail and luxurious texture — or prefer the bold brilliance of gleaming foil with the Spellbinders Glimmer Hot Foil System, this versatile combo set delivers stunning results with ease. It makes crafting effortless, impressive, and absolutely brag worthy.
I’m playing along with three card challenges today-Make My Monday #271, Pick 3 Challenge & Spellbinders Pop of Color Challenge. For the MMM challenge I had to use two dies and for the Pick 3 Challenge, I chose Flowers, Bright Colors & Embellishments. Spellbinders Pop of Color is fulfilled with my colorful red tulips!
Entering card challenges helps spark creativity and sometimes forces us to think outside the box-something I often need help with!! Challenges also connect us with a supportive, inspiring community of makers who share ideas, encouragement, and fresh perspectives. You don’t need a blog to join a challenge, just share your creation on Instagram, YouTube or another online platform and you’ll be golden! I hope you’ll give it a try 🙂


The Beauty of Tulips in Paper Crafting
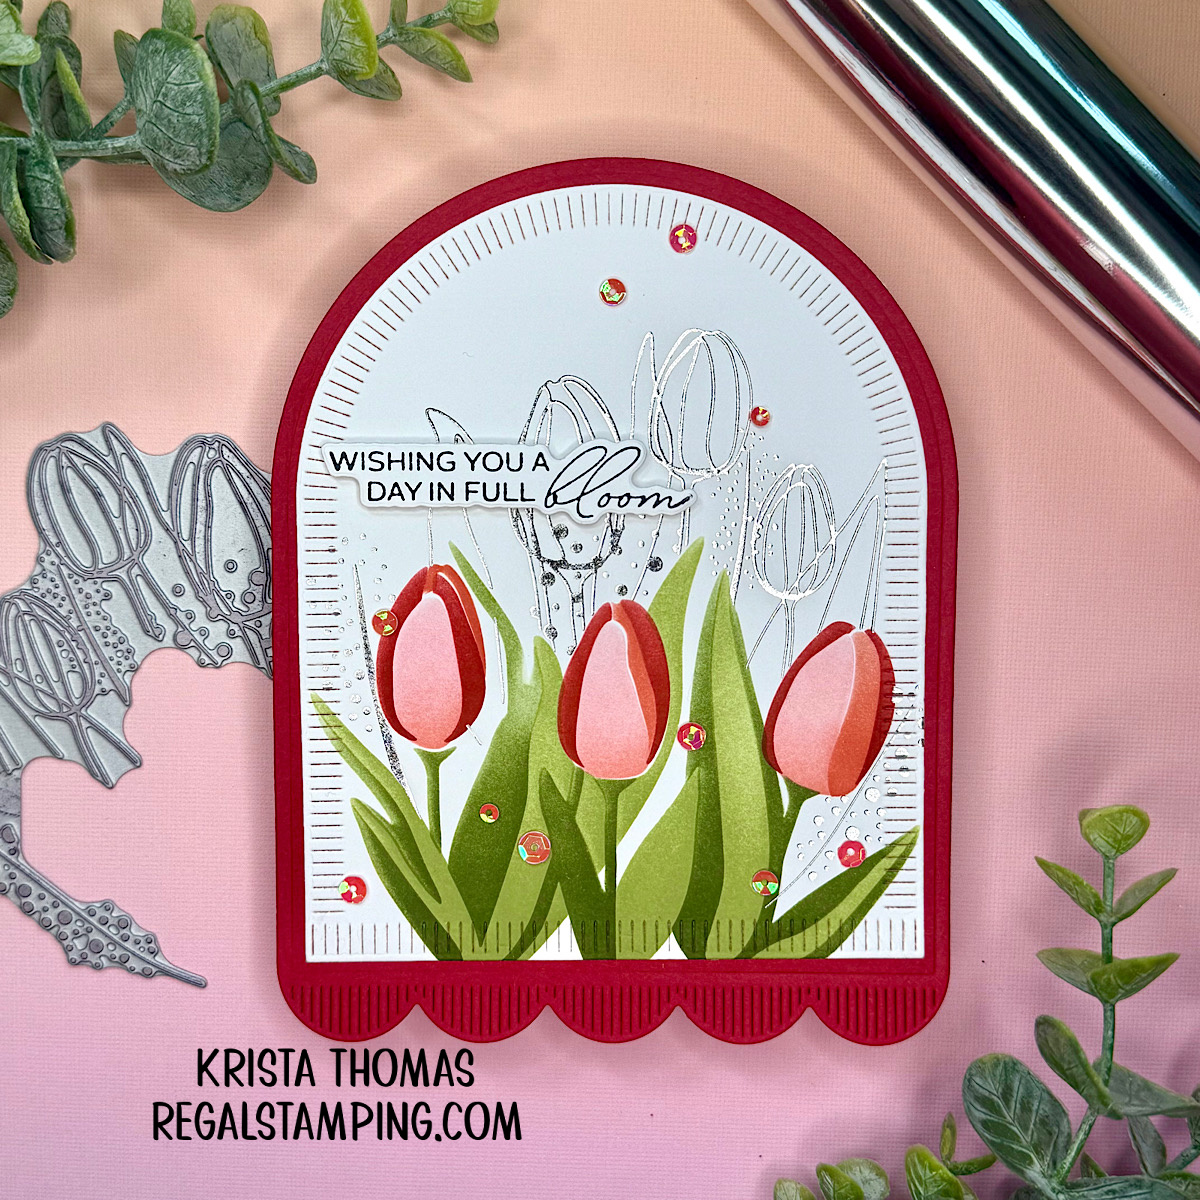
Tulips are one of the first signs that Spring has arrived and they come in so many beautiful shades of color. My favorites have always been red tulips, which is the color theme I chose for today’s card.

I began by foiling the tulips (From Ink to Petal) using my Glimmer Hot Foil System and a silver foil. The result against the white cardstock was vivid. Next, I placed the foiled panel onto a Waffle Flower Stencil Mat. This mat holds things in place while I’m ink blending, and it’s a tool I use often. I used water-based inks in pink, coral and red for the flowers, and two olive green tones for the leaves.
Once the stenciling was complete, I cut the floral display with the 2nd largest Make a Wish Arch Labels Die. I then used the largest arch die, which has a scalloped bottom edge, as my card base. It was cut from red cardstock. Next, I glued the tulip panel to the red panel.
Once more, I used the largest arch die and cut it from white cardstock. This became the back of the card after I attached it using the “hinge” method that I showed in this previous post.
A Sentiment in Full Bloom
The sentiment is part of the From Ink to Petal set, and I used the BetterPress System with black ink to create it. After cutting it with its coordinating die, I used foam mounting tape to pop it up across the card front.
Confession time: When I was stenciling the tulip leaves, I managed to smear some green ink above the tulips…so that’s where the sentiment HAD to go! LOL!! I like to call those kinds of mistakes “creative opportunities”, as there’s always a way to fix or hide a crafting mistake!

Extra Sparkle for the Finishing Touch
Finally, I reached into my stash of “all-things-sparkly & wonderful” and pulled out some pinkish-red iridescent sequins and added a few to finish things off. A jewel picker is a must-have tool when handling such tiny pieces and extra bling always make a card better! In my humble opinion 🙂
Between the shiny silver foiling and the gorgeous stenciled tulips, this card is truly in full bloom and was such a joy to create.
Until next time,
~Krista

Discover more from Regal Stamping
Subscribe to get the latest posts sent to your email.
This is absolutely gorgeous!!
Thank you, Lori! I can’t wait for the Spring flowers to pop up outside!!
This is a stunning card, I love the pretty florals and the gold shimmer in the background. I like how you’ve used the 3 elements, it’s very creative! Thanks for playing along at The Pick 3 Challenge and we hope you’ll share your creativity again soon.
Donna xx
Pick 3 Challenge
Inspiration Station Challenge
Paper Funday Challenges
Beautiful Blossoms Challenge
Thanks so much, Donna! And thank you for sharing the links to some new challenges I haven’t heard of! I’ll be checking them out for sure 🙂
Love this – what a great idea to foil the flowers in the background.
Thanks for joining us at The Pick 3 Challenge.
Helen x
DT
Thanks, Helen! I loved your card challenge!