A Valentine Design with A Perfect Blend Split Heart Dies
Today I’m sharing a simple card that I made by using the split heart dies from Spellbinders December Stitching Die of the Month, A Perfect Blend. These dies create half hearts, perfect for the mugs included in the set. You can see how they’re used in my previous post.
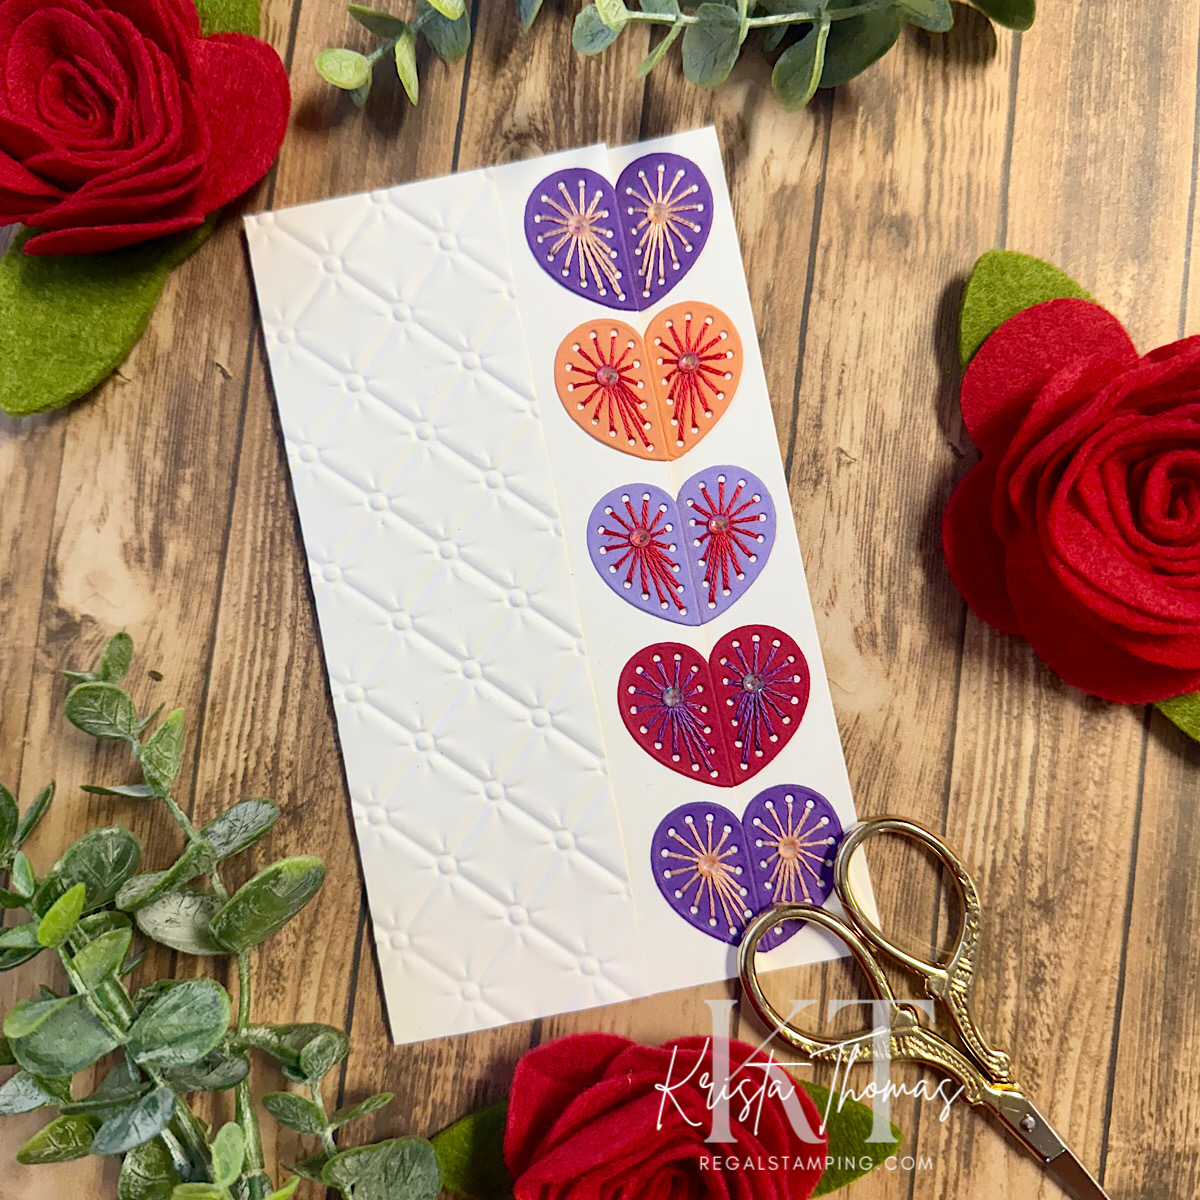
For a different twist, I went with a mini slimline card size, that when folded measures 3 1/2” x 6”. This petite size is a nice break from the typical A2 size and I should use it more often! (Envelopes sized 3 5/8” x 6 1/2” work with this card size and Taylored Expressions has a rainbow of colors!)
Choosing Colors
Any color combo would be lovely with this card design, be it a Christmas palette, soft pastels or an ombre’ effect. Today I chose a color palette of rich purple, vibrant red, and soft peach, perfectly suited for a Valentine’s theme. To add a touch of elegance and sparkle, I placed iridescent bling at the center of each half-heart, creating beautiful sparkle.
Cut & Stitch the Split Heart Pieces
To begin, I die cut five sets of hearts and included the stitching holes. I chose DMC threads to match the card stock colors, and then switched them all up. Peach thread on purple hearts, red thread on peach & lavender hearts and purple thread on the red hearts. Please note that if you don’t love stitching, you can omit the stitching holes when die-cutting!

Create an Inset Edge
I used the mini slim line size in portrait mode, with the fold at the left. It is folded so that the front open edge is inset by one inch from the back panel.

This clever fold allows each left-sided heart to be adhered along the front edge from top to bottom, with the corresponding right side sitting on the back panel. When the card is closed, the hearts appear as complete, unified shapes. Upon opening, however, they elegantly split apart, revealing their individual halves and adding an interactive element to the design.
Add Some Tufting
To add some textural interest, I embossed a 1 7/8” x 6” white panel with the Petite Tuft 3D embossing folder. It was then adhered along the left edge on the front of the card.
Add a Sentiment or Not?
Keeping with the clean design, I opted not to add a sentiment. However, a small word or sentiment would look lovely along the bottom edge, if desired.
In Summary
With just days until Christmas, I thought a change of pace would be good. Valentine’s Day is still weeks away, but it’s always fun to plan ahead! The split heart dies are still available with the Spellbinders Stitching Club- A Perfect Blend. Get them while you can!
I hope you find time during this busy season to craft a bit and lose yourself in the process! It’s the best therapy! 🙂

Until next time,
~Krista
Please note that this post contains affiliate links. If you follow one of my product links and make a purchase, then I receive a small commission at no extra cost to you. If you’d like to support my little blog, please follow my links when you shop! Please and thank you so much!!
Follow me:Discover more from Regal Stamping
Subscribe to get the latest posts sent to your email.