Hi Friends!🎄 I know it’s summertime and we’re all soaking up the sun—but for us crafty folks, it’s also the perfect time to start dreaming of snowflakes and sleigh bells! Spellbinders’ July 2025 Club of the Month is here, and it’s bursting with Christmas magic! ❄️⛄ From jolly snowmen and Santa Claus to cozy mittens and festive cheer, this month’s Deluxe Caboodle has everything you need to kick off your holiday crafting season in style.
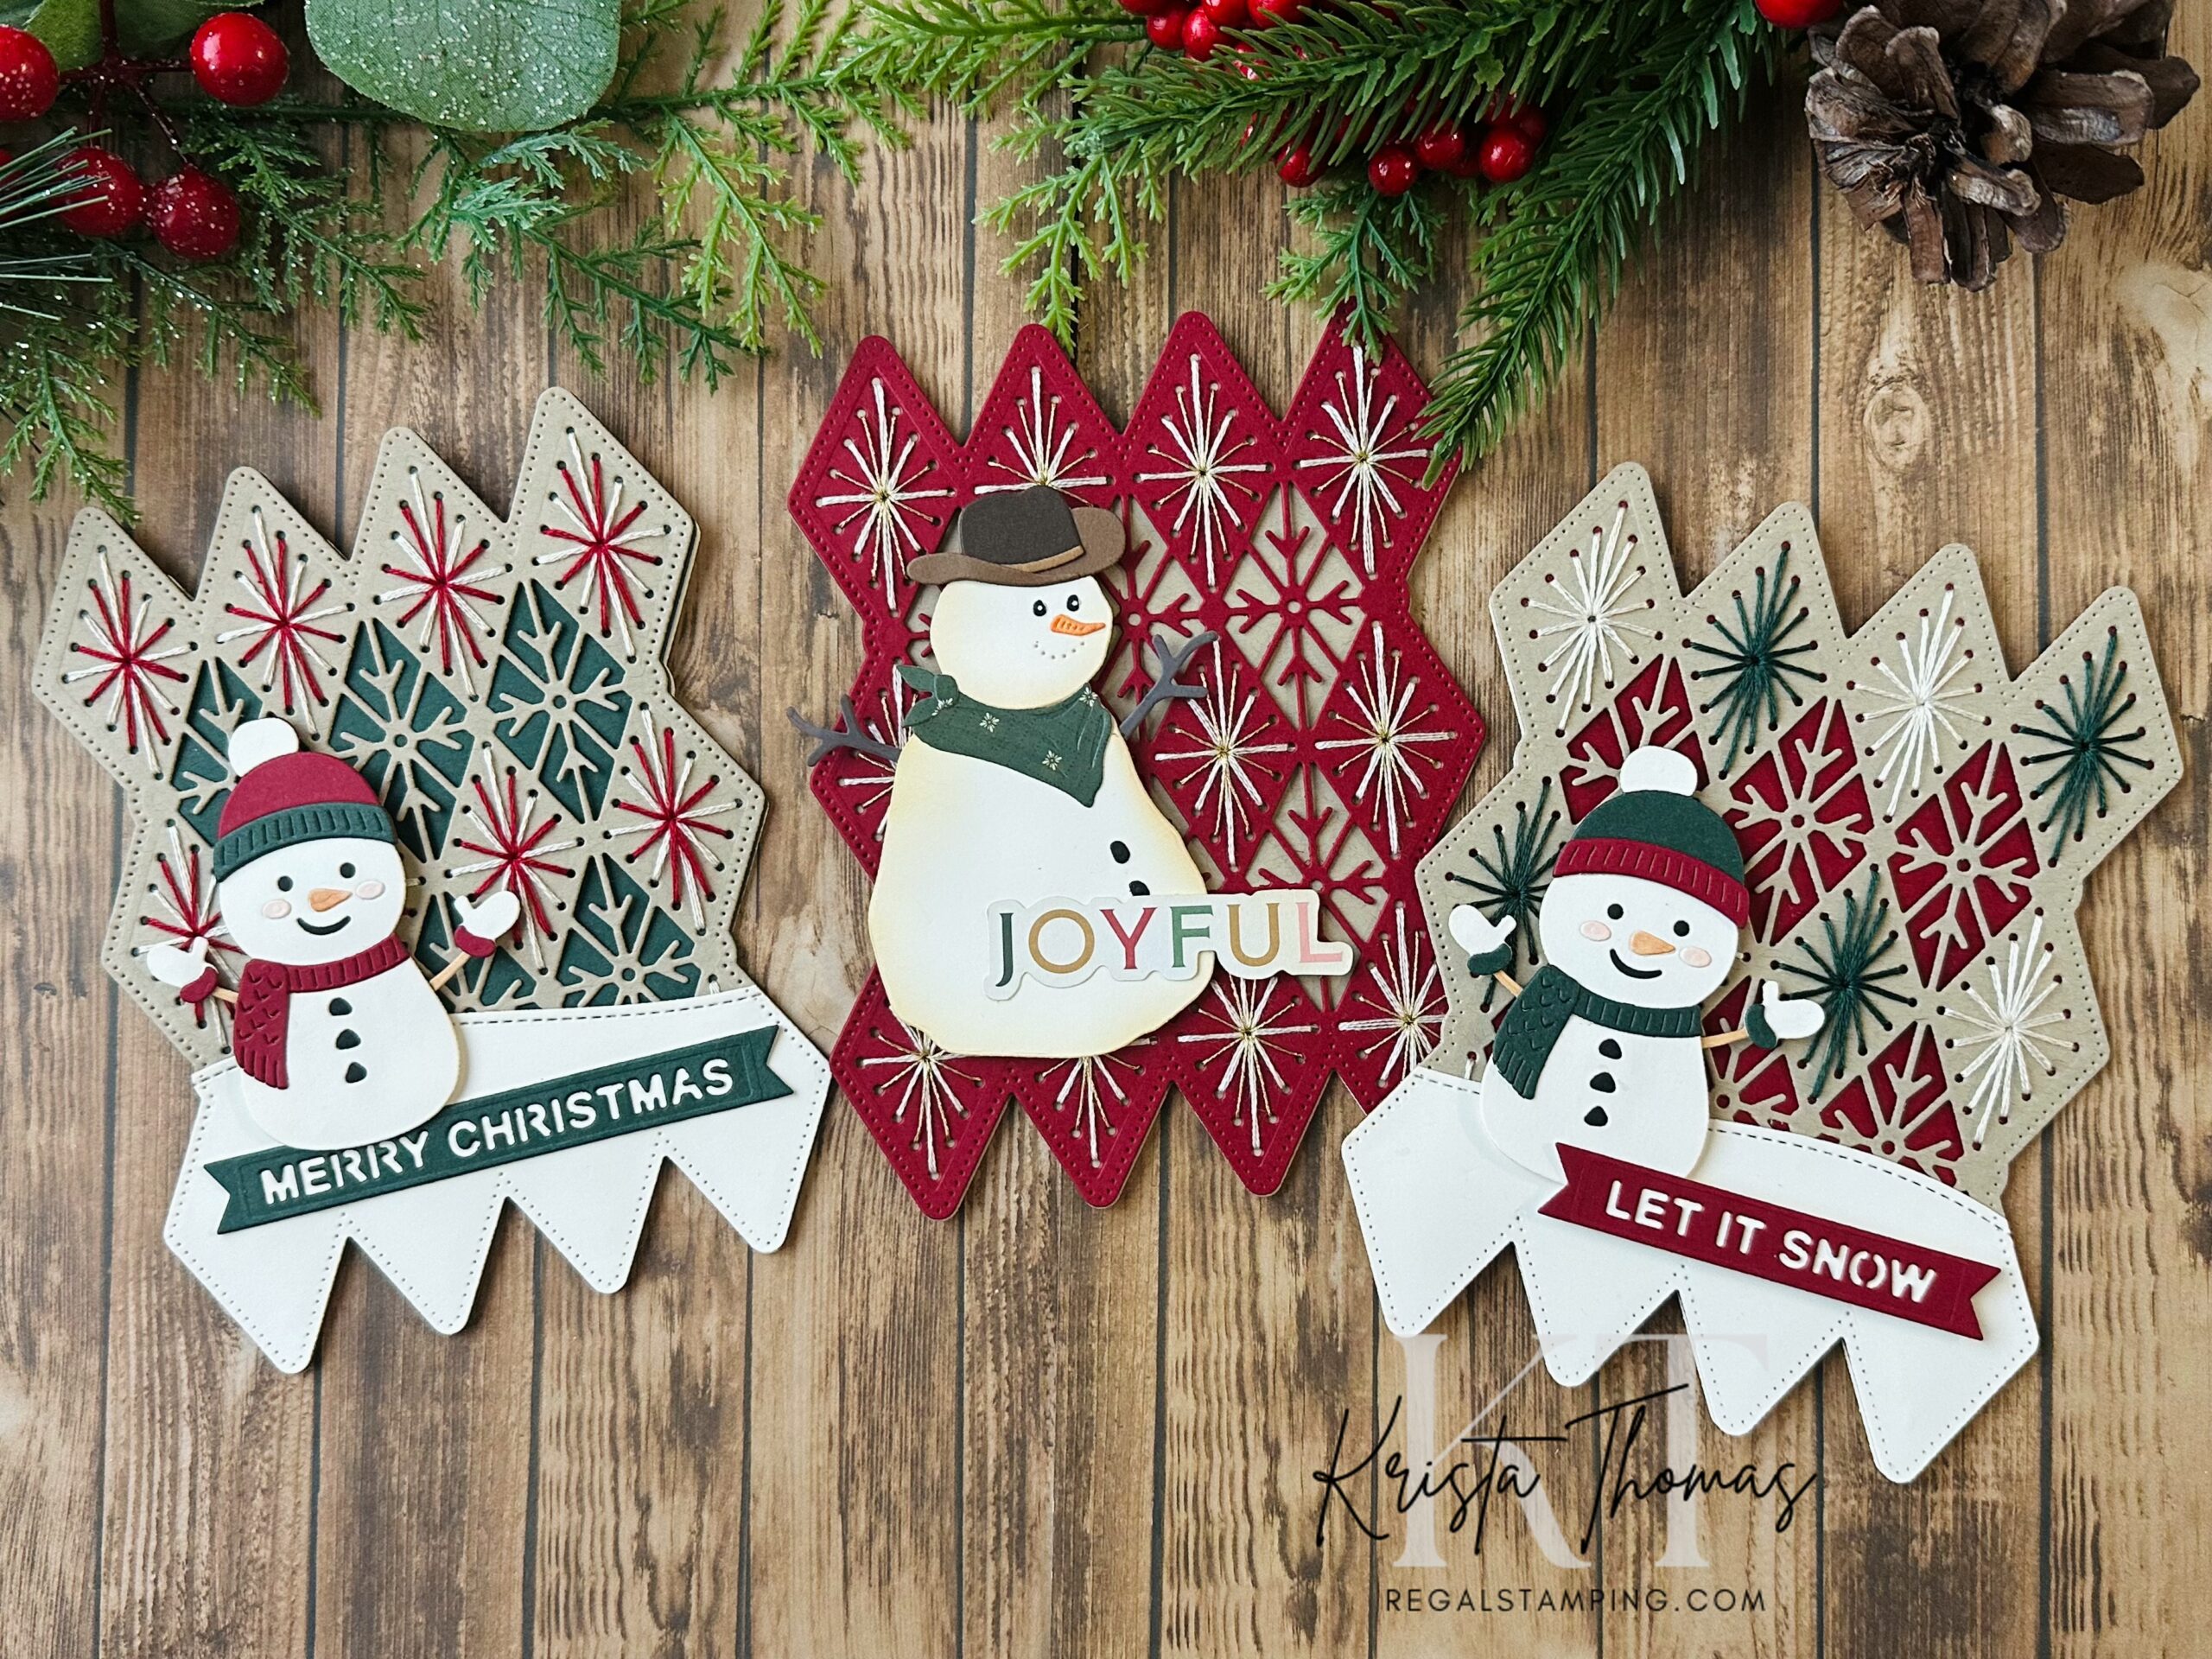
In addition to the clubs, there are multiple “new arrivals” filled with more Christmas cheer, including Country Christmas Snowman and North Pole Sentiments! Today I’m sharing three cards, each made with a fun background that was created with Frosted Stitch, the July Stitching Die of the Month. This die set makes an intricate cut of glistening snowflakes and a solid shaped piece perfect for color coordinated backgrounds. By hinging another solid die-cut panel to the back, it’s easy to create this beautifully shaped card!
It’s never too early to start spreading a little handmade joy, so let’s kick off your holiday with some inspiration!
The products I’m using are listed here:
July Stitching Die of the Month
Let’s kick off your holiday crafting!
Step by step:
I began by die cutting the backgrounds with Frosted Stitch, using cardstock in cherry & kraft. By using both the intricate die and the outline together, I created three ready-to-stitch panels.
Next I used only the outline die to cut solid pieces to go behind the previously cut panels, as well as another for the back of the card. I’ll explain how I hinged them later in this post!
Using DMC embroidery floss, I stitched each panel in a variety of earthy Christmas colors. After stitching was complete, I adhered each panel to it’s coordinating background using strong glue.
Continuing on, I created the focal points, using snowmen from Country Christmas Snowman and North Pole Sentiments. I repeated the earthy Christmas colors that were used on the stitching panels for the snowman hats, scarves, mittens and signs.
On two of the cards, I wanted to create a snowy landscape for the snowmen to sit upon. I cut vanilla cardstock with Lawn Fawn’s Stitched Hillside Borders dies. This helped ground the snowmen! I used dimensional foam dots to pop up the snowmen onto the backgrounds.

Making the hinged back:
Adding the hinged back of the card is easy, and I made a pictorial gallery to help explain it.
Scroll through the pictures below to see how to create the hinge for the back of the card. Once accomplished, the cards were complete!


I hope you’ve enjoyed this quick tutorial explaining how to create a shaped card with July’s Stitching Dies!
My craft room is overflowing with Christmas goodies, and I’ve been having an absolute blast creating this festive trio of cards to share with you! I hope you’re feeling the holiday spirit and are ready to kick off your holiday crafting!

With the holiday’s quickly approaching, it’s time to jump on the bandwagon and get those Christmas cards started! I hope I’ve inpired you and if you’re needing more inspiration, check out my Christmas critters ornaments from last year!
Until next time,
~Krista
Please note that this post contains affiliate links. When you click on a link within my blog and make a purchase, I make a small commission at no extra cost to you. Thank you for supporting my blog and the work that goes into it! You are SO appreciated!!

Discover more from Regal Stamping
Subscribe to get the latest posts sent to your email.