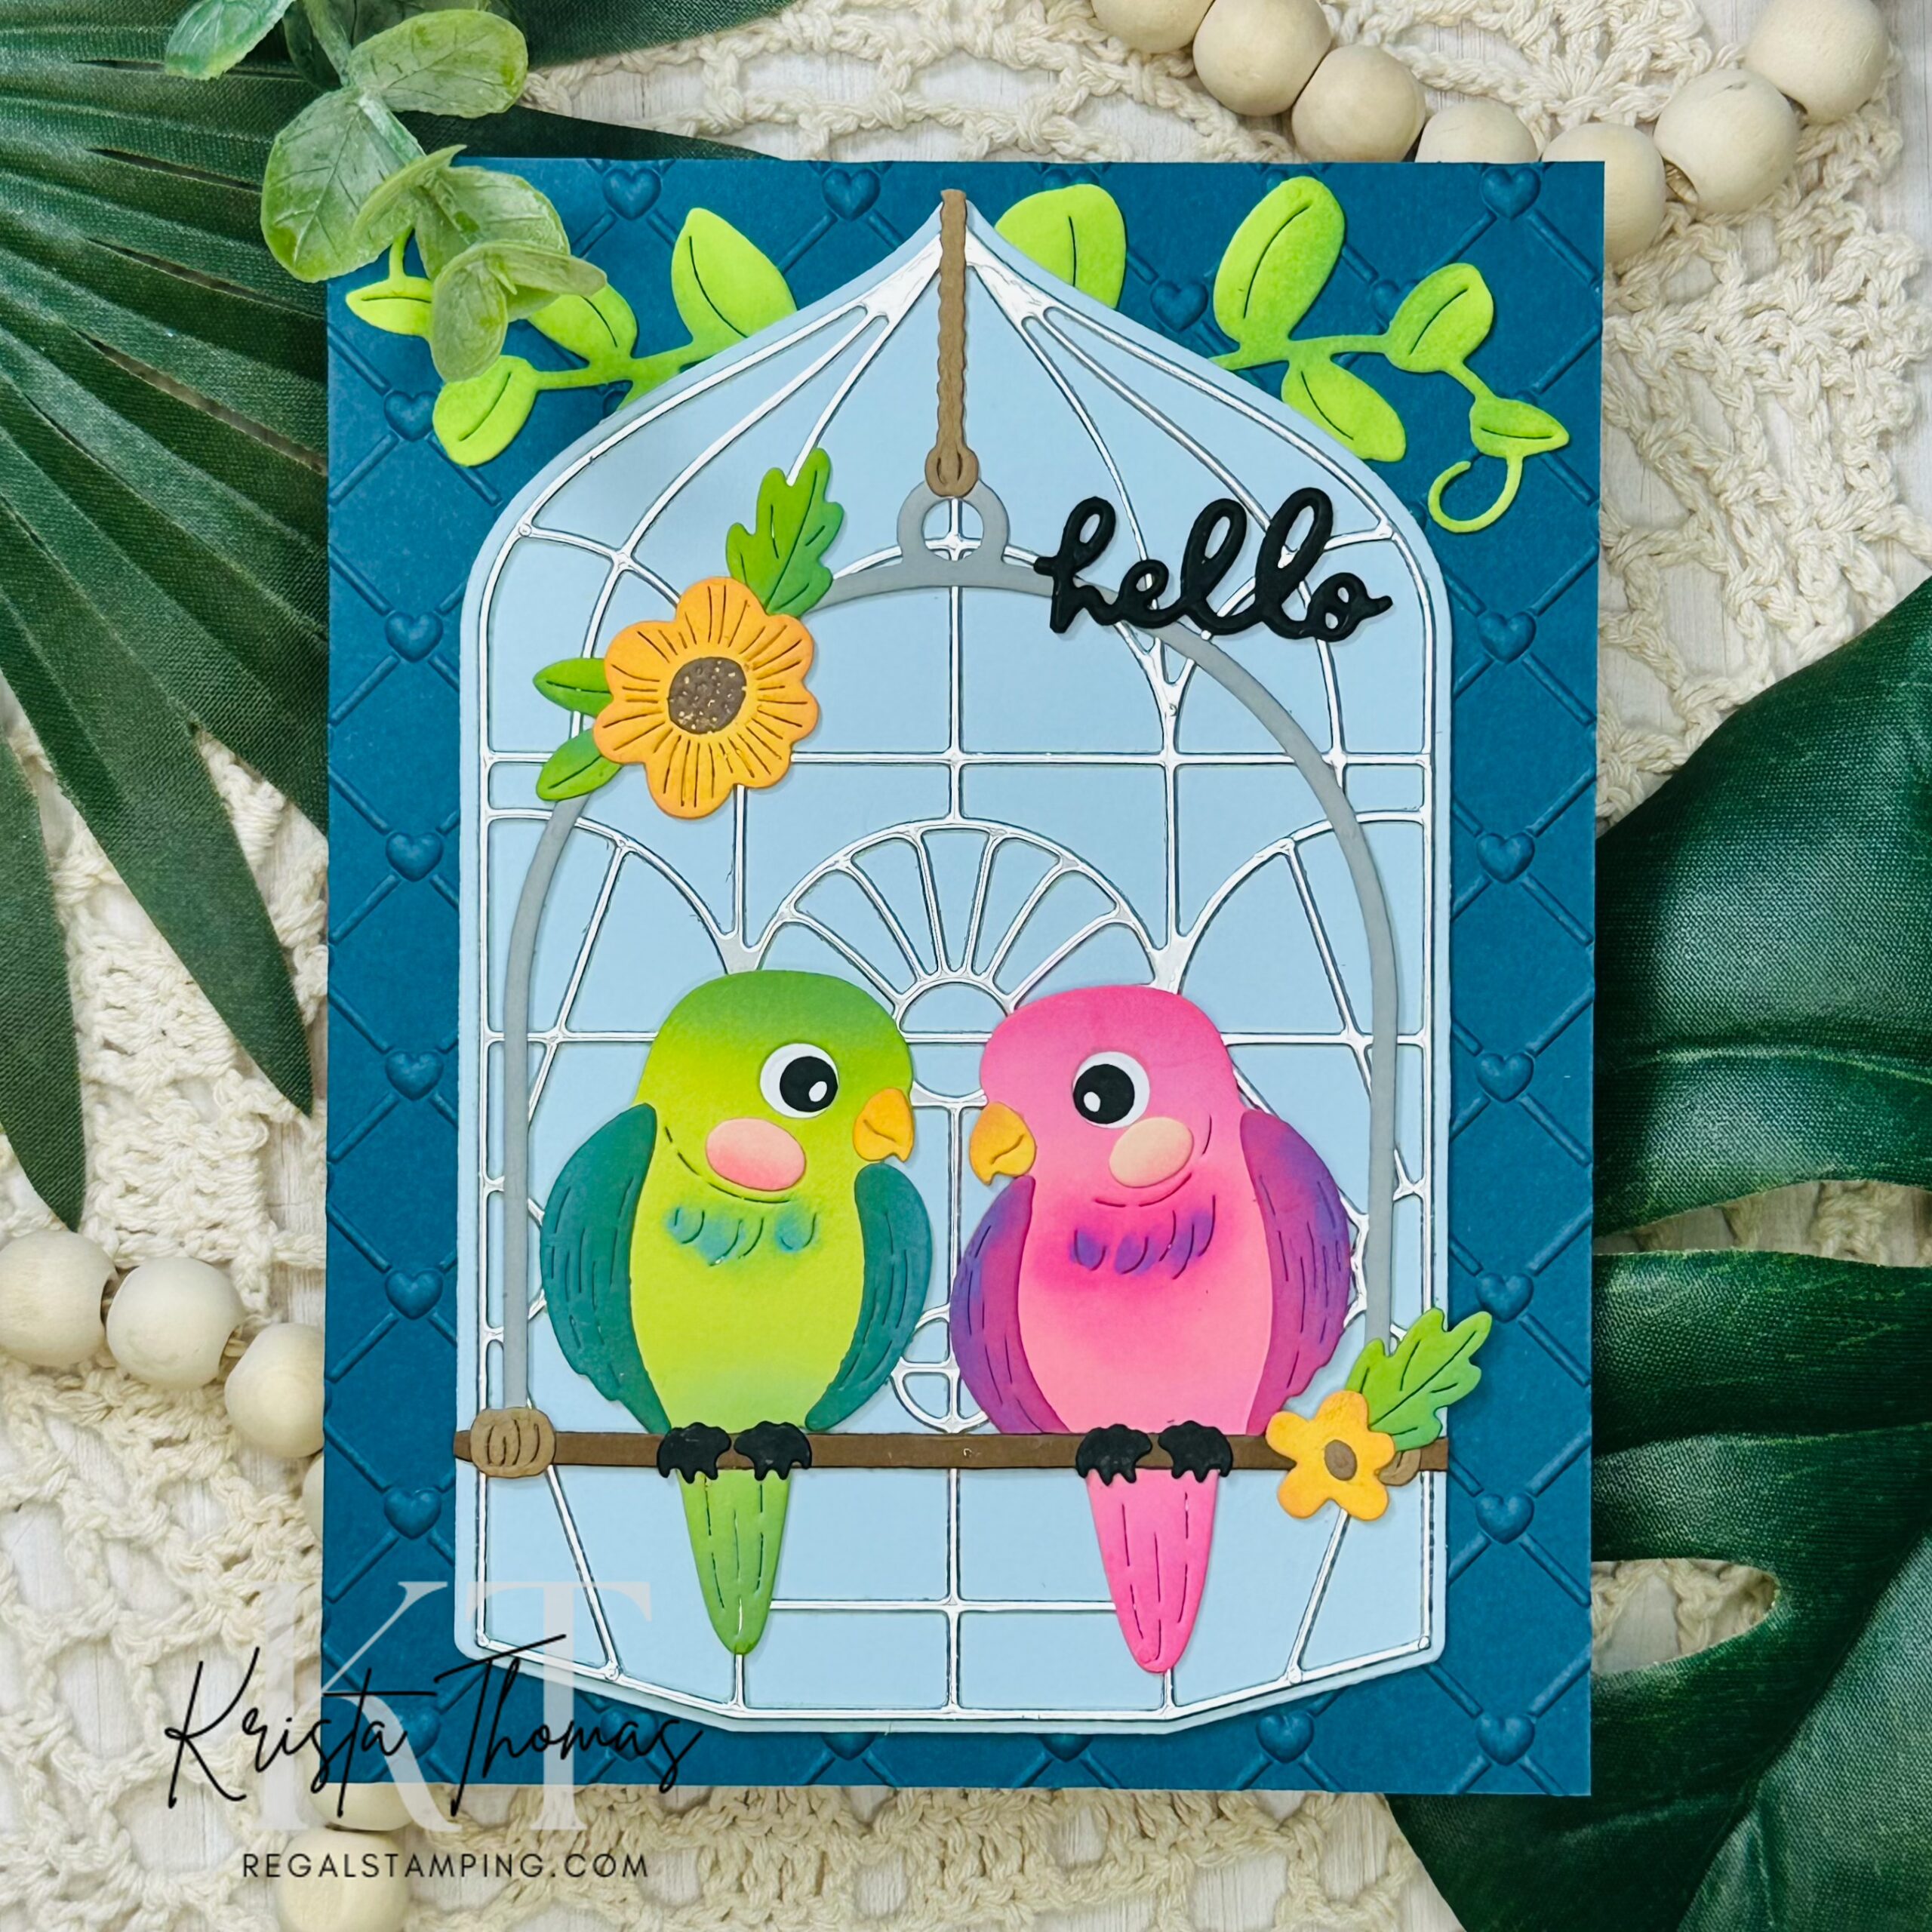
Hi Crafty Friends! I’m returning today with a card featuring Oscar’s buddy’s from the Cheerful Chirps Collection. If you missed meeting Oscar, you can see him in my Free Hugs post. Today’s Pretty Birds are love birds sitting together on a perch, gazing lovingly at each other.
The Pretty Birds dies include two birds, a perch, flowers, leaves and “hello”. For today’s creation, I added pieces from Botanical Atrium dies and embossed the background with Cross My Heart 3D embossing folder. Doesn’t that atrium work great as a bird cage?! It was originally part of the January 2025 clubs and I really hadn’t used it much…until now! If you love it too, grab it while you still can!
How I made my pretty birds…
Using Distress Oxide inks, I brought these adorable little birds to life with layers of rich color and subtle shading. I started by die-cutting the birds from cheerful Peridot green and a soft, Tutu pink card stock.

Coloring the green pretty bird…
To give the green bird a more dynamic, natural look, I blended in Mowed Lawn, Rustic Wilderness and Forest Moss around the edges, adding depth and a hint of woodland charm. For a playful twist, I brushed Broken China onto the chest and wings, creating a soft, unexpected pop of cool blue that adds character and contrast.
Coloring the pink pretty bird…
The pink bird was given a dreamy, whimsical glow with soft shadowing in Kitsch Flamingo and the richer tones of Picked Raspberry. To add a touch of magic and unexpected depth, I blended in a hint of Wilted Violet on the chest and wings—like a sunset catching feathers in just the right light.
Creating the perch and floral accents…
Using the rest of the dies from the Pretty Birds set, I cut out the perch from Anchor and Truffle card stocks.
The flowers and leaves were cut from white and then inked with Mustard Seed, Gathered Twigs, Twisted Citron and Mowed Lawn Distress Oxide inks.
“Hello” was cut out three times from Raven card stock and then glued together. Having several layers creates depth for such an intricate die!
Making the bird cage…
While perusing my Spellbinders stash to see what I could use with the pretty birds, I came across the Botanical Atrium die set and knew it was a bird cage in the making! I actually think I squealed with excitement at my discovery! 🙂
From the atrium die set, I cut the background piece from Windy card stock, a soft grayish-blue that I absolutely adore. The intricate piece was cut from Metallic Silver paper and I used a dotted tape runner to adhere it to the backdrop.
My tip for gluing intricate die cuts:
I like Elmer’s Dot Runner because it’s inexpensive and works great on fragile pieces that are difficult to glue. Just be sure to place your piece onto a silicone mat while adding the dotted tape runner. (The dots will ONLY stick to the intricate piece!)

Finishing my pretty birds card…
I chose a beautiful Oceanside card stock for the card base, texturing it with Cross My Heart 3D embossing folder.
I wanted some greenery at the top and added two vines from the Botanical Atrium set and ink blended with Twisted Citron and Mowed Lawn Distress Oxide inks.
After carefully gluing the pretty birds and flowers to the assembled perch, they were adhered to the atrium (aka birdhouse)and then onto the card base.
Why I love mixing & matching…
I love mixing and matching different products that I have, because it makes all of my purchases more valuable. Whenever I buy something new, I make whatever it is and then add it to my “Stash Book”. This makes it SUPER easy to see what I have at a glance and is very inspiring when I am crafting. Initially it’s a lot of work, but it’s so, so worth it! Each page goes into a sheet protector and then a notebook. Here’s a picture to help explain…


I love sharing these ideas with you and hope that you’ll find inspiration from them in your own craft space.
Until next time,
~Krista

This post contains affiliate links which means if you click on one of my links and make a purchase, then the company pays me a small referral commission at no extra charge to you. Thank you for shopping from my links!
Follow me:Discover more from Regal Stamping
Subscribe to get the latest posts sent to your email.