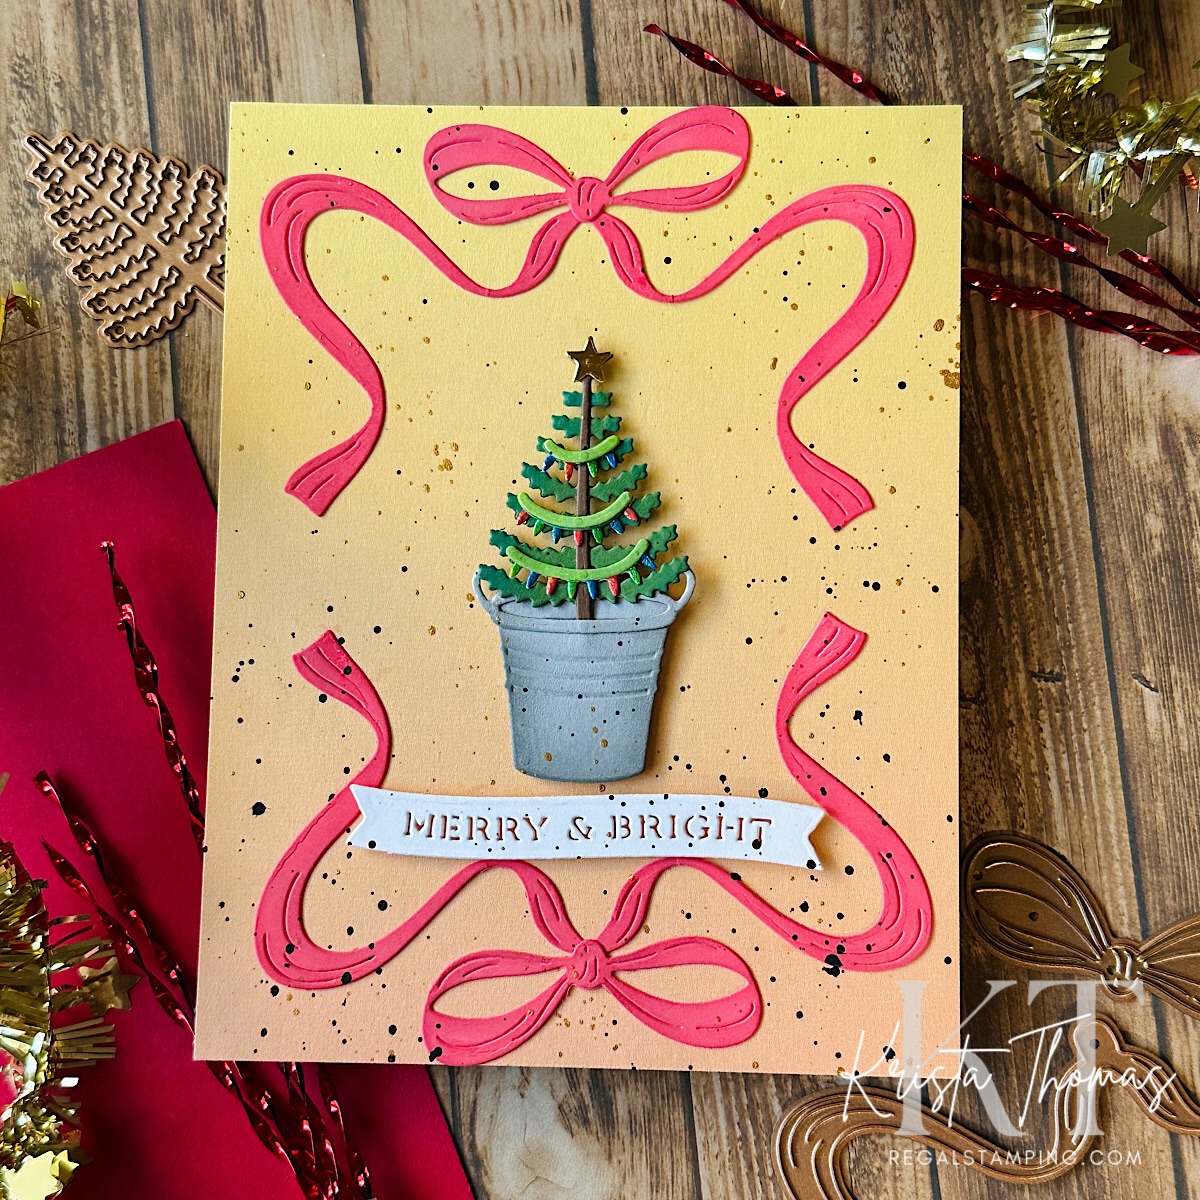
Hi Crafty Friends! Today is a continuation of my Christmas in July posts, and I’m sharing a card that features pieces from two different sets. I’ve always been a sucker for pretty bows, so it’s no surprise that the new Gifting Bow dies immediately caught my eye! This elegant design is perfect for framing a focal point—just like I’ve done on today’s card using not one, but two bows.
Nestled between the bows is a potted tree, one of the charming elements from the Christmas Rocking Chair die set. I used a festive banner from the Gifting Bow dies to “ground” the tree and complete this very quick & easy card!
Simplicity is a must when you’ve got a long mailing list during the holidays, so let’s take a look at how easily it came together.

Choose a background:
I cut a 5.5” x 4.25” panel from Lawn Fawn’s newest paper, Gleeful Gradients. This wonderful paper pack offers a multitude of different color gradients and is quickly becoming a favorite of mine! In both 12×12 and 6×6 packs, you can choose the size you like best.
Making a Gifting Bow:
The Gifting Bow is created using two dies, so I cut each one twice from white cardstock. After cutting, I placed the pieces on a sticky mat to make ink blending easier. Using Distress Oxide inks in Abandoned Coral and Candied Apple, I blended the perfect shade to complement the background panel.
After gluing the pieces together, I arranged both bows onto the background panel with one at the top and the other upside-down at the bottom. I just love how the streamers create a frame!
Creating a potted tree:
Selecting dies from Christmas Rocking Chair, I quickly cut out the necessary pieces using card stocks in gray, green, brown & metallic gold. The light strings were cut from white.
The two gray pot pieces were ink blended with Black Soot Distress Oxide ink and then adhered together.
The brown tree trunk was glued to the front of the green tree and a cheerful gold star was added to the top.
Stringing the lights…
Finally it was time to string some lights for the tree! These dies have two parts…the lights and the strings, each in three lengths.
I colored the strings with an Ohuhu Alcohol Marker, #GY1. The lights were colored with Ohuhu Glitter Markers in alternating colors of red, green and blue, which truly makes them sparkle!

After gluing the strings to the lights, I positioned them on the tree and adhered them into place.
A banner sentiment…
With dies from Gifting Bow, I cut the banner from white card stock and used adhesive foam to pop it up beneath the tree. This served two purposes, grounding the tree and adding a simple sentiment!
Finally, the paint splatters!
After everything was complete, I splattered the entire card front with black and bronze watercolor paints. I just love this look and often add it to my cards. Once dry, I glued the completed panel to a white card base measuring 11” x 4.25”, scored at 5.50”.
In conclusion…
By using pieces from two die sets, I was able to create a fun but simple Christmas card! I enjoy finding ways to combine my purchases, making each one a more useful part of my crafting experience!
Bows can add so much to a finished piece and I’m always on the lookout for more! See my previous posts, Calling All Beauty Enthusiasts and Wrapping Things Up, for more wonderful bows and card ideas.
Thank you for visiting today!
~Krista

Discover more from Regal Stamping
Subscribe to get the latest posts sent to your email.