With fall just around the corner, I can’t resist reaching for those warm, earthy colors that make the season so cozy. The new Texture & Foliage Collection is just right for capturing that autumn charm—especially the Autumn Greetings Wreath dies, which are perfect for building twiggy, grapevine-looking wreaths, framing your favorite designs, or adding rustic borders to your cards.
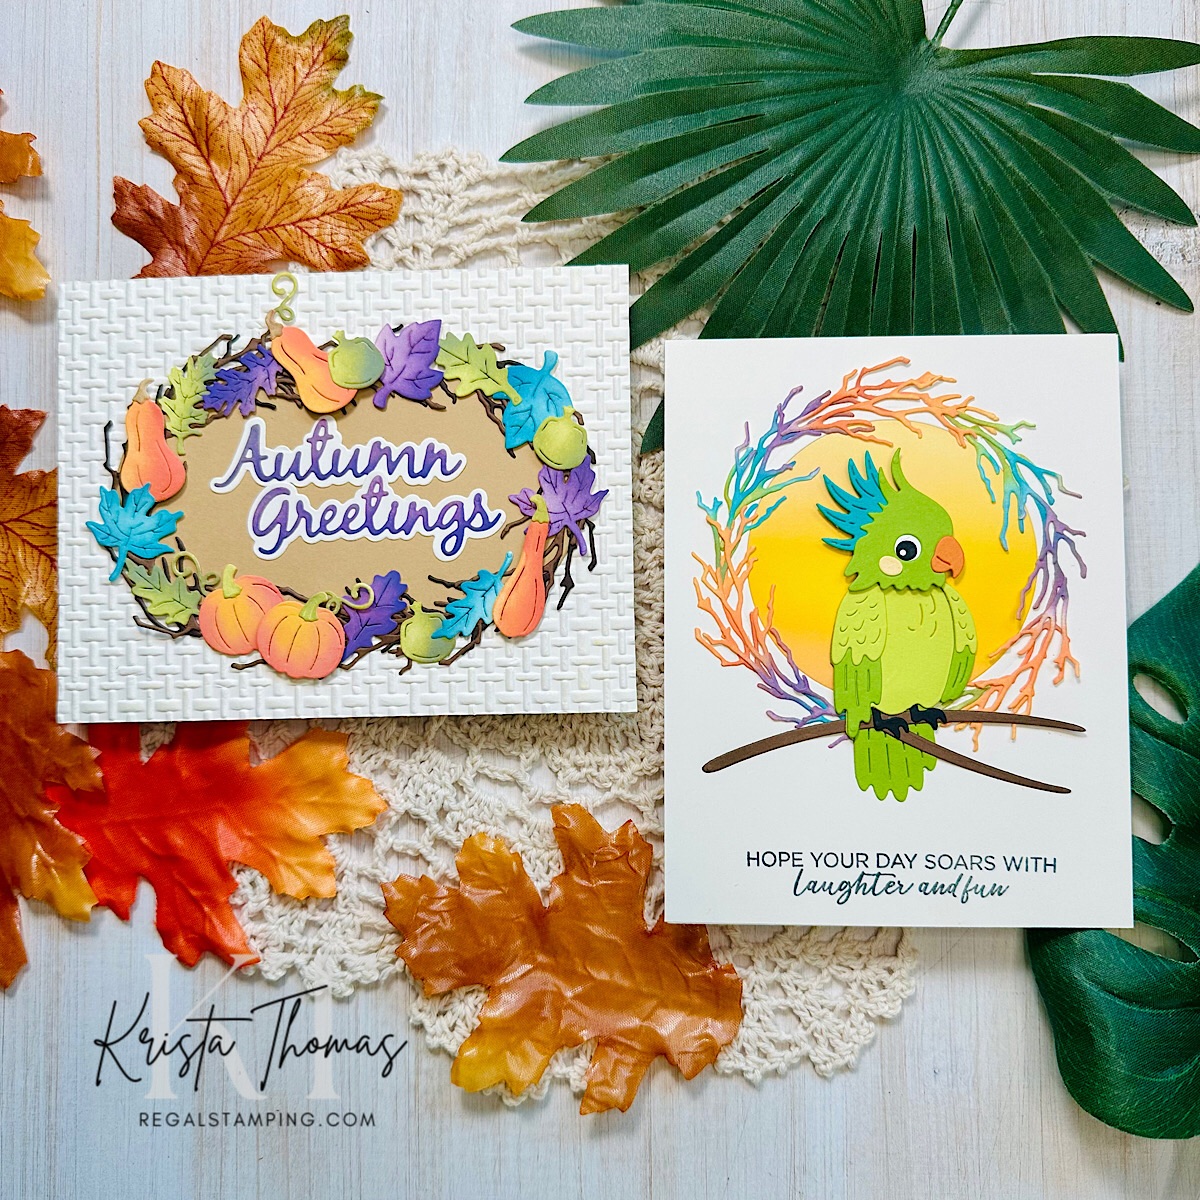
Today I’m sharing two cards that I made with the Autumn Greetings Wreath dies. You’ll see that one card is fully geared towards autumn, while the other has a tropical vibe. As always, I enjoy finding diverse ways to use my crafting supplies!
Create an Oval Autumn Greetings Wreath
On my first card, I used an oval die, cutting it from Fawn ColorWheel Cardstock. It was adhered to a Linen 3D textured Alabaster panel measuring 4.25” x 5.5”.

Using the oval as a guide, I placed my die cut wreath pieces, both curved and straight, around the shape. These wreath pieces were cut from Acorn and Truffle ColorWheel Cardstock.

Continuing on, I die cut the gourds and leaves from Alabaster card stock. Color was added to each piece with Distress Oxide inks and blending brushes. Following is a list of the ink colors that were used:
- Wild Honey, Spiced Marmalade, Ripe Persimmon
- Dusty Concord, Villainous Potion
- Peeled Paint, Forest Moss
- Peacock Feathers, Uncharted Mariner

The finished pieces were placed around the oval wreath and then adhered into place with either glue or foam dots.
Finally, the words “Autumn Greetings” and the mats were cut from Alabaster cardstock.

I kept the background uninked and used Dusty Concord and Villainous Potion to ink blend the actual words. Once glued together, the sentiment was adhered to the center of the oval and my card was finished.

Using the Wreath as a Frame
After finishing the first card, I found myself admiring those rich fall colors and started wondering—what would a rainbow wreath look like? That thought sent me back to my die-cutting machine, cutting pieces from Alabaster and carefully ink blending them with the same Distress Oxide colors I used on card #1.

I used a 2 1/2” circle die to cut a hole into an Alabaster panel measuring 4.25” x 5.5”. The circle was ink blended with Distress Oxides and then secured back into the opening. I then began placing the rainbow-inked wreath pieces around the circle, adhering them into place.
Then I browsed through my die collection, looking for just the right image to showcase inside the rainbow frame. A tropical bird seemed like the perfect choice! I went with the cockatoo from the Flying High Dies in the Cheerful Chirps Collection, cut out the pieces, and assembled my colorful feathered friend.

Once he was positioned within the frame, I added a sentiment from Spread Your Wings Sentiments. This was stamped with Black Soot Distress Oxide ink, directly onto the card base.
In summary…
I hope I’ve shown you the versatility of the Autumn Greetings Wreath Dies, not only as a seasonal wreath, but as a frame! If you need more autumn inspiration, see my previous post where I shared a card made with Falling Leaves Dies!
If you’ve never used Spellbinder dies before and are curious about their quality, let me assure you that they are top notch! I have never had any issues with getting a great cut and would highly recommend this brand. With their broad range of styles, there’s something for everyone at Spellbinders!
Until next time,
~Krista

*This post contains affiliate links. If you click on one of my links and a purchase is made, I will receive a small commission at no extra cost to you. This helps offset the cost of maintaining my blog and I thank you for each and every purchase!
Discover more from Regal Stamping
Subscribe to get the latest posts sent to your email.